Install Windows Feature
Install-WindowsFeature command in PowerShell on AWS
The Install-WindowsFeature command is used to install specific features on a computer running the Windows Server operating system in an AWS environment, or on an offline virtual disk (VHD) that has Windows Server installed. This command works similarly to installing roles and features through Server Manager, with one important exception: it does not automatically install management tools for the features. To install management tools such as snap-ins on a target server, you need to add the IncludeManagementTools parameter to your command.
Note that this command requires elevation permission; You need to be running a Windows PowerShell session as an administrator to use this command.
Example of installing features with management tools on AWS:
Install-WindowsFeature RSAT-AD-Tools, RSAT-DNS-Server, Multipath-IO, Failover-Clustering -IncludeManagementTools -Restart
Explain:
- RSAT-AD-Tools: Install Active Directory service management tools.
- RSAT-DNS-Server: Install DNS server management tool.
- Multipath-IO: Set up the Multipath I/O feature.
- Failover-Clustering: Install the Failover Clustering feature.
- IncludeManagementTools: Add this parameter to install management tools for selected features.
- Restart: Restart the computer after installation is complete.
1. Install or upgrade the AWS NVMe driver using PowerShell
If you are not using the latest Windows AMIs provided by Amazon, you can perform the following procedure to install the current AWS NVMe driver. You should perform this update at a convenient time to restart your virtual machine. Either, the installation script will automatically restart your virtual machine, or you will have to manually restart the virtual machine as a final step.
2. Prerequisites
- PowerShell 3.0 or later
3. To download and install the latest AWS NVMe drivers
We recommend that you create an AMI as a backup as follows, in case you need to roll back to an older version.
When you stop a virtual machine, the data on the virtual machine’s storage volumes is deleted. Before stopping your virtual machine, make sure you have copied any data you need from your virtual machine’s storage volumes to persistent storage, such as Amazon EBS or Amazon S3.
- In the navigation bar, select Virtual Machines (Instances).
- Select the virtual machine that needs to upgrade the driver, then select Instance state, Stop virtual machine (Stop instance).
- After the virtual machine is stopped, select the virtual machine, select Actions, then Images and templates, and then select Create Image (Create image).
- Select Virtual machine status (Instance state), Turn on virtual machine (Start instance).
- Connect to your virtual machine and log in with the local administrator account.
4. Download and extract the driver to your virtual machine using one of the following options:
Use browser:
- Download the latest driver package to your virtual machine.
- Unzip the zip file.
Using PowerShell:
Invoke-WebRequest https://s3.amazonaws.com/ec2-windows-drivers-downloads/NVMe/Latest/AWSNVMe.zip -outfile $env:USERPROFILE\nvme_driver.zip
Expand-Archive $env:userprofile\nvme_driver.zip -DestinationPath $env:userprofile\nvme_driver

- Install the driver into your virtual machine by running the PowerShell install.ps1 script from the nvme_driver folder (.\install.ps1). If you get an error, make sure you’re using PowerShell version 3.0 or later. (Optional) Starting with AWS NVMe version 1.5.0, Small Computer System Interface (SCSI) persistent reservations are supported for Windows Server 2022 and later. This feature adds support for Windows Server Failover Clustering with shared Amazon EBS storage. By default, this feature is not enabled during installation.
You can enable this feature when running the install.ps1 script to install the driver by specifying the EnableSCSIPersistentReservations parameter with a value of $true.
cd C:\Users\Admin\nvme_driver
C:\Users\Admin\nvme_driver\ .\install.ps1 -EnableSCSIPersistentReservations $true
You can disable this feature when running the install.ps1 script to install the driver by specifying the EnableSCSIPersistentReservations parameter with a value of $false.
PS C:\> .\install.ps1 -EnableSCSIPersistentReservations $false

Starting with version 1.5.0 of AWS NVMe, the install.ps1 script always installs the ebsnvme-id engine along with the driver.
(Optional) For versions 1.4.0, 1.4.1 and 1.4.2, the install.ps1 script allows you to specify whether the ebsnvme-id tool should be installed with with driver or not.
To install the ebsnvme-id tool, specify InstallEBSNVMeIdTool 'Yes'.
If you do not want to install the tool, specify InstallEBSNVMeIdTool 'No'.
If you do not specify InstallEBSNVMeIdTool and the tool is already available at C:\ProgramData\Amazon\Tools, the package will upgrade the default tool. If the tool is not available, install.ps1 will not upgrade the default tool.
If you do not want to install the tool as part of the package and want to install it later, you can find the latest version of the tool in the driver package. Or you can download version 1.0.0 from Amazon S3:
Download the ebsnvme-id tool: [https://s3.amazonaws.com/ec2-windows-drivers-downloads/EBSNVMeID/Latest/ebsnvme-id.zip](https://s3.amazonaws.com/ ec2-windows-drivers-downloads/EBSNVMeID/Latest/ebsnvme-id.zip)
If the installer does not restart your virtual machine, restart the virtual machine.

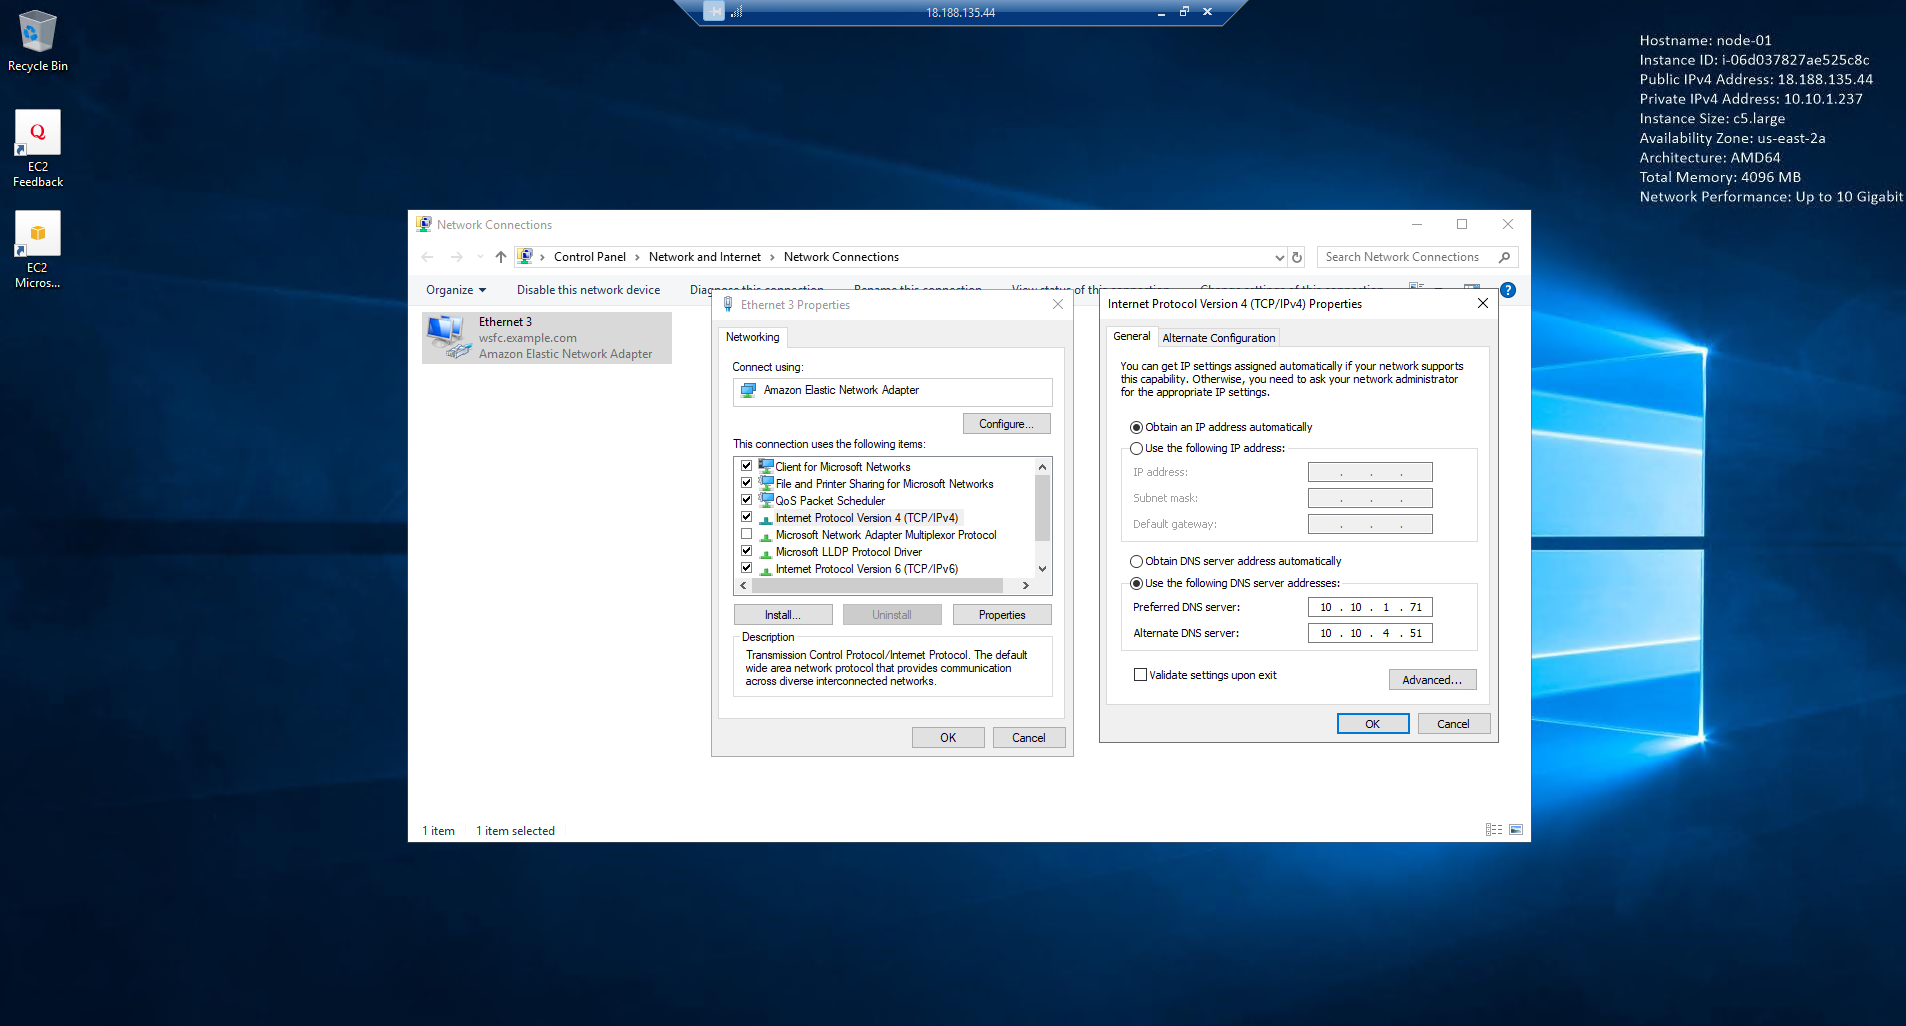
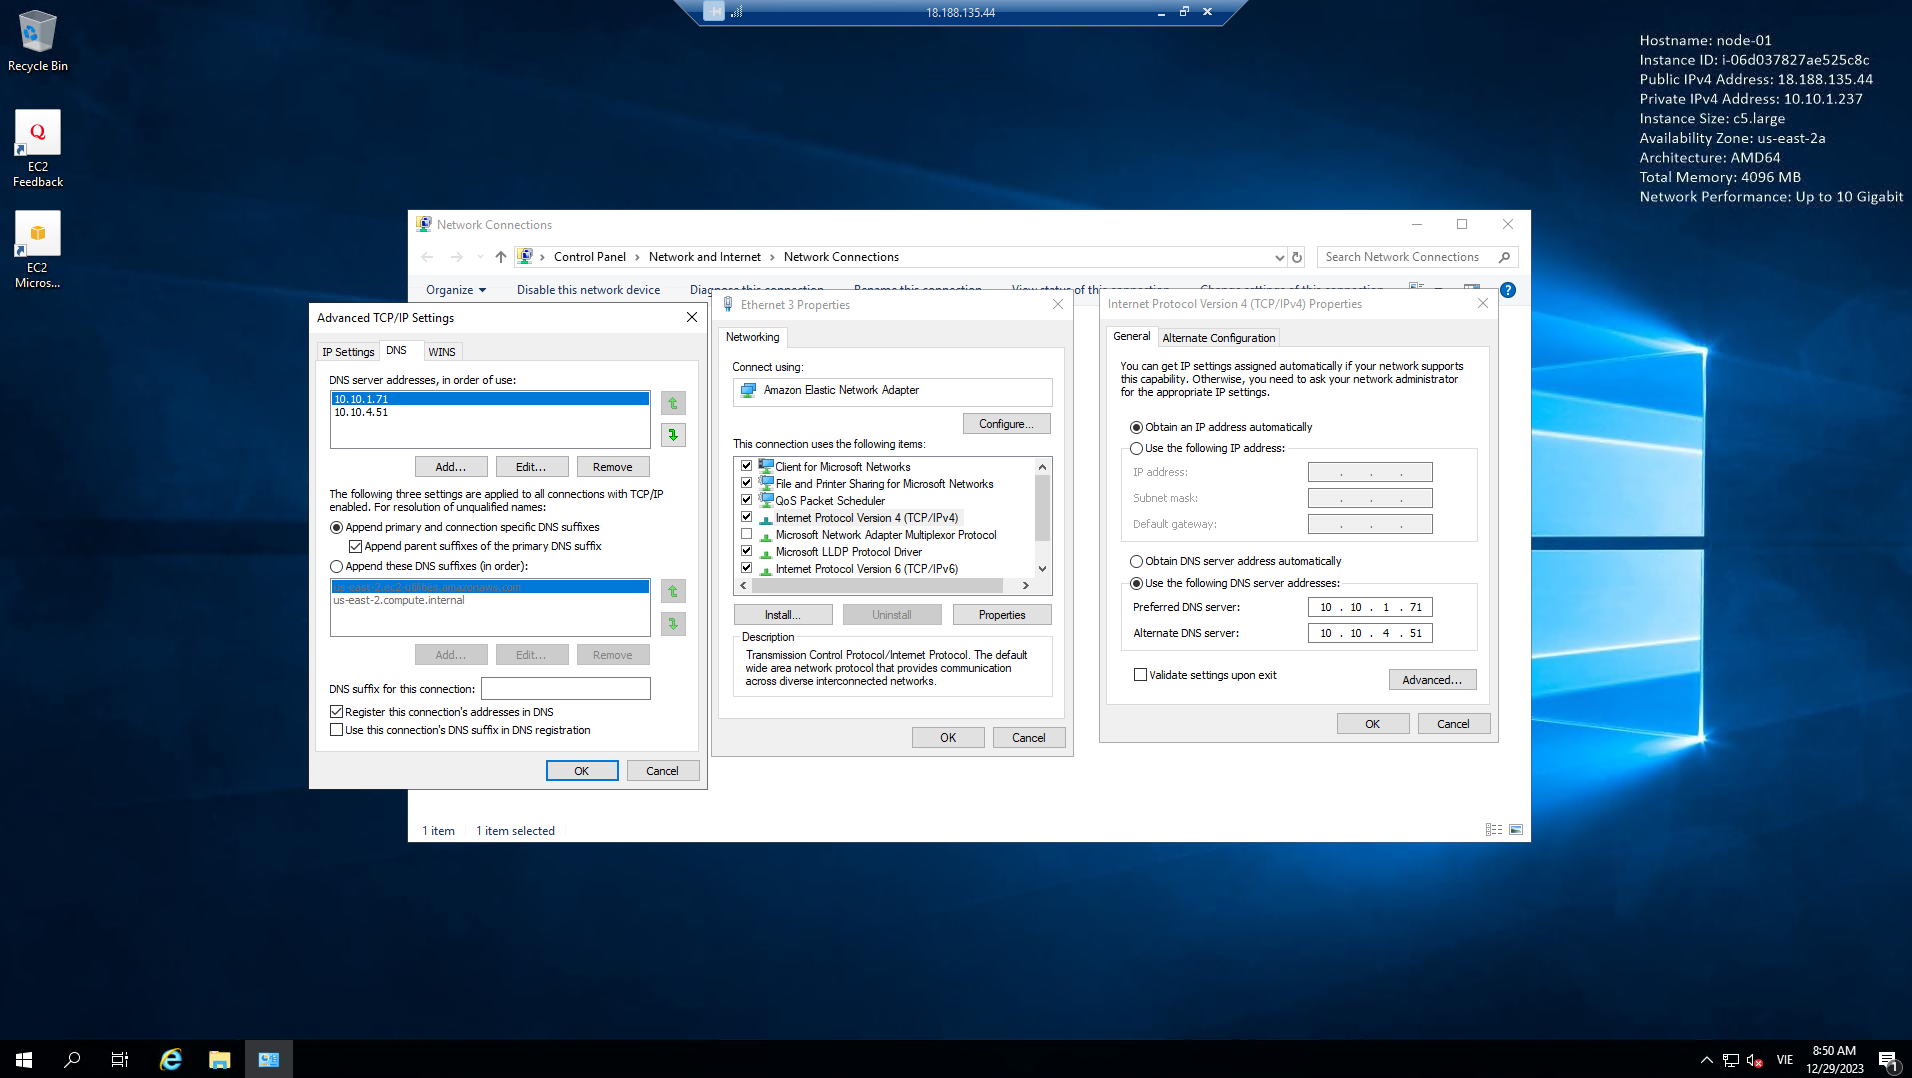
To configure DNS suffixes to use Active Directory (AD) in AWS, you need to perform the following steps:
-
Go to Network Adapter Settings.
-
Select Ethernet (Ethernet Network).
-
Go to Properties (Settings).
-
Select IPv4 Properties (IPv4 Settings).
-
Go to Advanced Tab.
-
Go to DNS section.
-
Select the option Append primary and connection specific DNS suffixes (Add primary DNS suffix and connection specific DNS suffix).
Note: You need to ensure that you have registered an Active Directory (AD) DNS server for your network server before performing this configuration.
- Similar to EC2 node-02